

Bathtub surfaces don’t stay smooth and shiny forever. Over time, they get scratched, stained, chipped, or worn out. If your tub is looking more like an old relic than a spa-worthy spot, don’t panic—you don’t always have to replace it.
Fixing a tub surface can be done with the right knowledge, tools, and a little patience. I’ve been down this road myself, and let me tell you—it’s a lot less intimidating once you know the steps.
1. Understanding Why Tub Surfaces Get Damaged
Bathtub damage happens more often than people think. From daily use to harsh cleaners, everything leaves a mark eventually. The most common causes of tub surface damage include:
- Scratches and abrasions: caused by scrubbing with abrasive pads.
- Stains and discoloration: from minerals in hard water, rust, or soap scum.
- Chips and cracks: when heavy objects fall on the tub (I once dropped a shampoo bottle, and it left a chip the size of a coin).
- Fading or dullness: due to years of cleaning with chemicals or exposure to hot water.
According to a survey by Home Innovation Research Labs, 57% of homeowners complain about their tubs looking worn or stained after just 8–10 years of use. That means your tub isn’t broken—it’s just crying out for a little TLC.
2. Identifying Your Tub Material
Before you even think about repairing, you need to know what your tub is made of. Different materials require different fixes.
- Porcelain-on-steel tubs: These are durable but prone to chips and rust spots.
- Acrylic tubs: Lightweight and affordable but scratch easily.
- Fiberglass tubs: Common in modern homes, but they fade and crack faster than others.
- Cast iron tubs: Heavy-duty and long-lasting, but when the enamel chips, rust sets in.
Here’s the trick: tap your tub. If it gives a metallic “clink,” it’s likely steel or cast iron. If it sounds hollow, it’s probably acrylic or fiberglass. Knowing this is key because a fiberglass repair kit won’t do much for a porcelain tub.
3. Cleaning the Surface Before Repair
Imagine painting over a dusty wall—messy, right? The same applies here. Any repair on a dirty tub will fail quickly. Cleaning sets the foundation.
Here’s how I do it:
- Mix warm water with dish soap and scrub the tub with a non-abrasive sponge.
- Remove stains with baking soda paste or vinegar (avoid bleach—it weakens surfaces).
- Rinse thoroughly and let the tub dry completely.
- For stubborn rust spots, use a fine steel wool pad gently, but don’t overdo it.
This step sounds boring, but trust me, it’s the make-or-break moment. A repair done on a greasy or soapy surface will peel off within weeks.
4. Repairing Small Scratches and Scuffs
Tiny scratches might not seem like a big deal, but they make tubs look permanently dirty. Luckily, they’re the easiest to fix.
- For acrylic or fiberglass tubs, use a buffing compound (like car polish). Rub it in circles until the scratch blends out.
- For porcelain tubs, a porcelain repair paste or even white appliance touch-up paint works like magic.
A friend of mine tried toothpaste as a hack, and while it shined temporarily, it washed away after a single bath. Stick with proper products—you’ll thank yourself later.
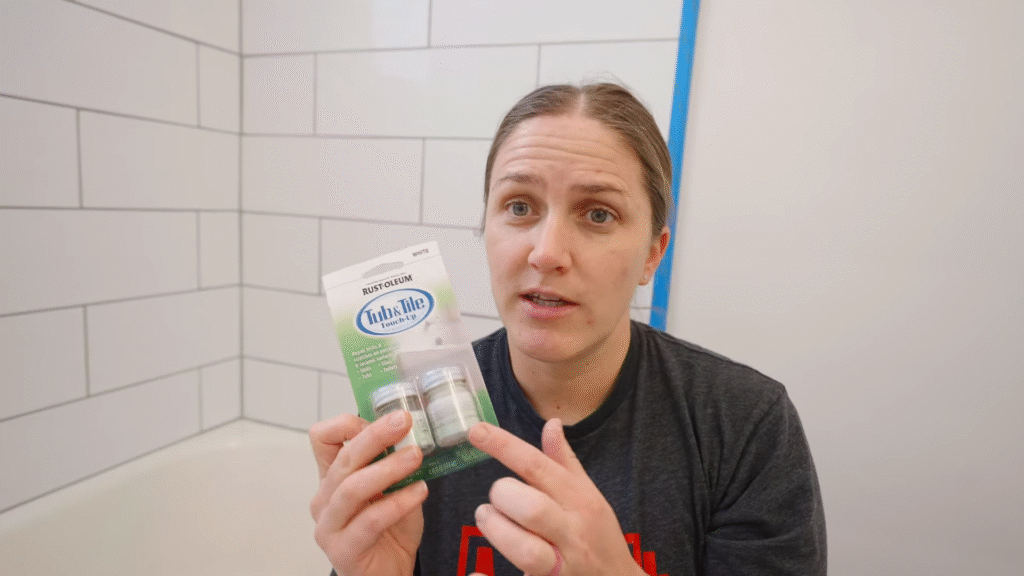
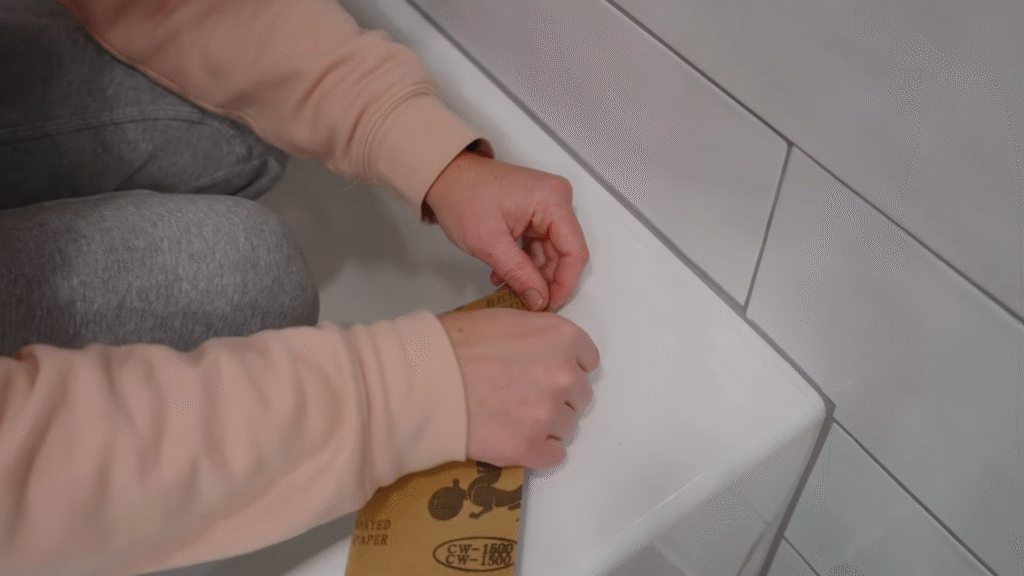
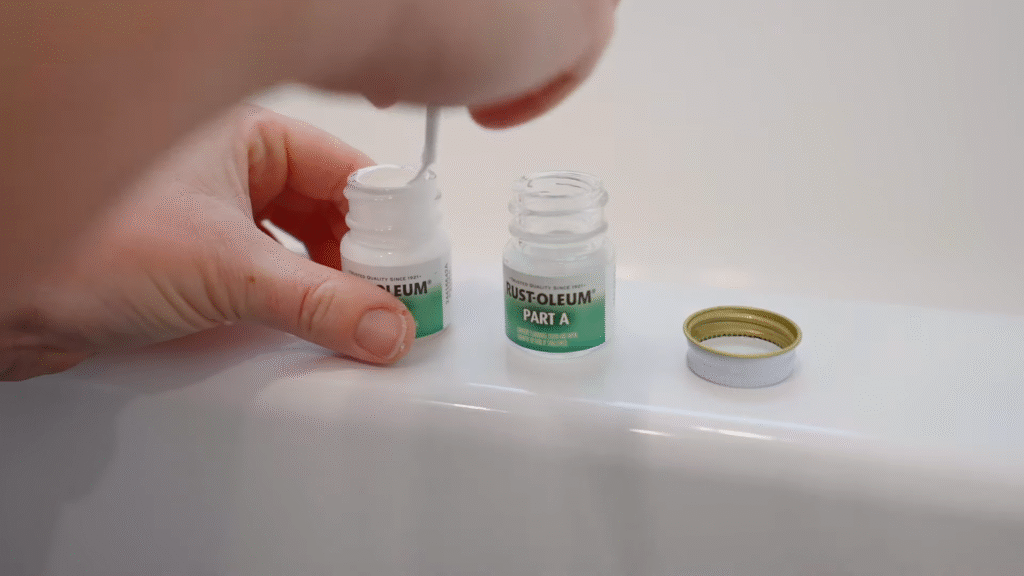
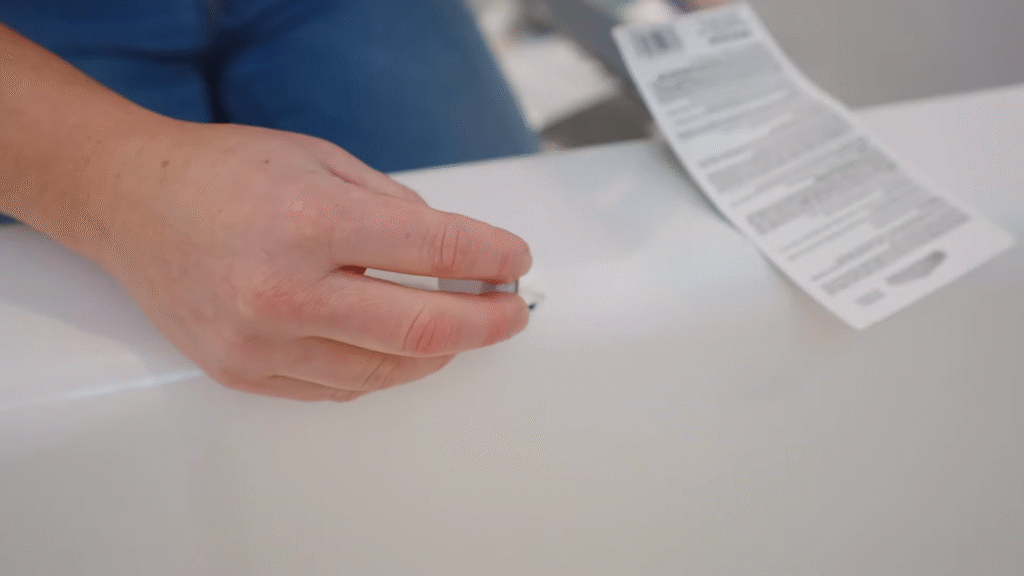
5. Filling Chips and Cracks
Now we’re getting into the more serious repairs. A chipped tub doesn’t just look bad—it can rust or grow mold inside the crack.
Here’s the step-by-step for most tub materials:
- Sand the damaged area with fine sandpaper to roughen it slightly.
- Apply a tub repair kit (you can buy ones made for porcelain, acrylic, or fiberglass). They usually come with filler and finishing paste.
- Smooth the filler with a putty knife and let it cure.
- Sand again lightly and repaint with matching enamel or epoxy.
The good kits cost around $15–$30 and can save you from spending $400–$600 on professional repair. According to HomeAdvisor, professional refinishing costs average $459 in the U.S., so DIY really pays off here.
6. Resurfacing a Dull or Stained Tub
If your whole tub looks tired—yellowing, rough, or impossible to clean—it might be time for resurfacing. This isn’t just a patch-up; it’s a makeover.
Steps:
- Etch the surface with sandpaper or an etching solution to help paint stick.
- Mask off the bathroom with painter’s tape and plastic (resurfacing sprays can get messy).
- Apply a tub resurfacing kit (epoxy-based paint designed for tubs).
- Let it cure for at least 48 hours before using.
This process can make a 20-year-old tub look brand new. The results last about 10–15 years if maintained properly. Think of it like giving your bathtub a facelift without the surgeon’s bill.
7. Preventing Rust Damage
Rust is the silent killer of tubs, especially porcelain or cast iron. If ignored, it spreads quickly.
To fix small rust spots:
- Sand down the rusted area until smooth.
- Clean thoroughly with rubbing alcohol.
- Apply porcelain repair paint to seal it.
To prevent rust in the first place:
- Always wipe your tub dry after use.
- Fix leaky faucets (constant drips cause rust rings).
- Avoid leaving metal cans (like shaving cream) on the tub surface.
I learned the hard way after leaving a rusty razor in the corner of my tub. It left a perfect little orange circle that took weeks of scrubbing and repainting to erase.
8. When to Call a Professional
Not every repair is DIY-friendly. Sometimes, the tub is too far gone. If you see:
- Large cracks running across the tub
- Severe rust holes
- Leaks that won’t stop
- Multiple failed repair attempts
It’s time to call in a pro. According to Angi (formerly Angie’s List), hiring a professional refinisher costs between $300–$600, while a full tub replacement averages $1,200–$3,000. So even if you bring in help, it’s often cheaper than a new tub.
9. Maintaining Your Tub After Repairs
Once you’ve fixed your tub, keeping it in good shape is just as important. Here are the golden rules:
- Use non-abrasive cleaners (avoid scouring powders).
- Rinse after every bath to prevent soap buildup.
- Deep clean weekly with vinegar or baking soda.
- Don’t drop heavy objects (sounds obvious, but I’ve dropped everything from shampoo to my phone in mine).
- Re-seal chips quickly to stop them from spreading.
Think of your tub like a car—you wouldn’t fix a dent and then ignore oil changes. A little maintenance stretches your repair’s life by years.
10. Cost Breakdown: DIY vs Professional
Here’s what you can expect in terms of money:
- DIY scratch removal: $10–$20 (buffing compound or paste).
- DIY chip repair kits: $15–$30.
- Resurfacing kits: $50–$100.
- Professional refinishing: $300–$600.
- Full tub replacement: $1,200–$3,000+.
Most people can fix scratches, chips, and even resurfacing at home. For anything structural or major, it’s worth investing in professional help.
Conclusion
Fixing a tub surface might sound like a weekend project, but it’s really about choosing the right solution for the type of damage. Small scratches and chips? A DIY kit will do the trick. Whole tub looking like it belongs in a horror movie? Resurfacing can save it. Severe cracks and leaks? That’s when the pros step in.
Your bathtub doesn’t need to be tossed out at the first sign of wear. With the right approach, you can extend its life for another decade or more, saving money and keeping your bathroom looking fresh.
FAQs
1. Can I use nail polish to fix a chipped tub?
Yes, for very tiny chips on porcelain tubs, white nail polish works as a temporary fix. But it’s not waterproof long-term. A proper repair kit is much better.
2. How long does a resurfaced tub last?
On average, a resurfaced tub lasts 10–15 years with good care. Avoid abrasive cleaners to maximize its life.
3. Is resurfacing safe to do yourself?
Yes, if you follow instructions carefully. Just ensure good ventilation since epoxy fumes are strong.
4. Can I shower after resurfacing my tub?
No, wait at least 48 hours before using the tub to allow the coating to cure fully.
5. What’s the cheapest way to make my tub look better?
If the surface is just dull, buffing with a polishing compound or applying a refinishing paint kit is the most budget-friendly option.