

If your bathroom sink is broken, leaking, or just plain refusing to do its job, don’t panic. Repairing a bathroom sink isn’t rocket science, and you don’t need to call a plumber every time a crack appears or water drips.
The truth? With the right tools, a little know-how, and some patience, you can repair your bathroom sink yourself—saving both money and frustration.
1. Understanding the Types of Bathroom Sink Damage
Before you start swinging wrenches and smearing epoxy, you need to know exactly what’s wrong with your sink. Bathroom sinks usually break or malfunction in one of four main ways:
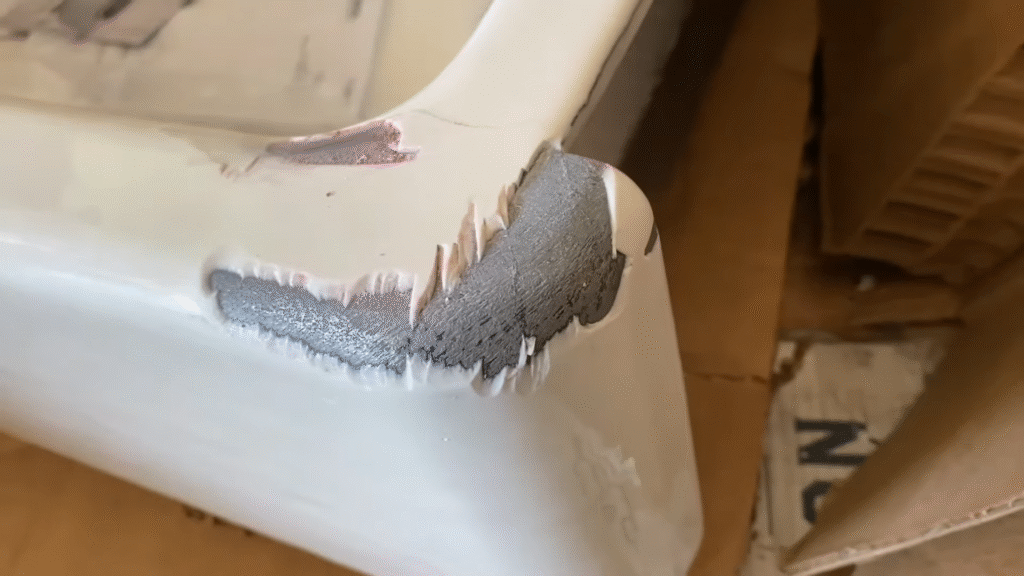
- Cracks and chips in the basin – These are often cosmetic but can become leaks if ignored. A heavy object falling into the sink (hello, hairdryer or curling iron) is the usual culprit.
- Leaks around the faucet or drain – If you see puddles forming, chances are the seals, washers, or pipes are the issue.
- Clogs in the drain – Not technically a “break,” but a clogged sink is a broken sink in the eyes of someone who needs to brush their teeth.
- Loose or damaged pipes underneath – The U-shaped pipe (P-trap) under your sink is often the scene of the crime when leaks appear.
Stat to know: According to HomeAdvisor, the average plumber visit for a simple sink repair costs between $150 and $400, depending on the issue. If you can handle it yourself, that’s money straight back into your pocket.
When I cracked my porcelain sink last year, I thought I’d need to replace the entire thing. Turns out, a porcelain repair kit and a Saturday afternoon were all it took. That experience taught me that half the battle is diagnosing the problem correctly.
2. Tools and Materials You’ll Need
Imagine trying to fix a car with just a butter knife. That’s how it feels to repair a sink without the right tools. Here’s your repair toolbox checklist:
- Adjustable wrench – For tightening nuts and bolts under the sink.
- Plumber’s tape (Teflon tape) – Prevents leaks around threaded connections.
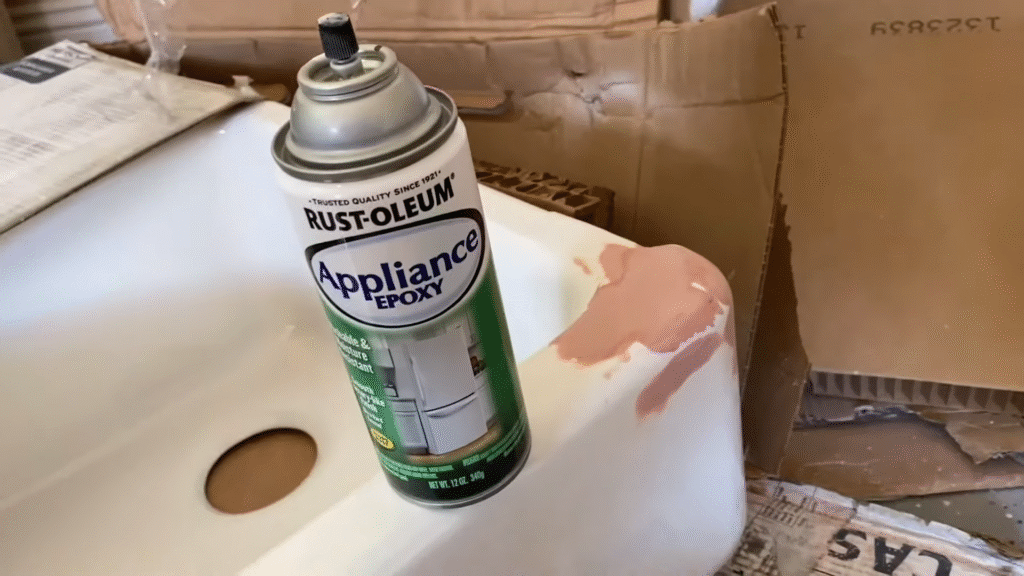
- Epoxy or porcelain repair kit – To seal cracks and chips in the sink basin.
- Pipe wrench – If the P-trap is stuck and needs some muscle.
- Bucket and rags – You’ll need these when water inevitably spills.
- Replacement washers and seals – For faucet or drain leaks.
- Plunger or drain snake – To tackle clogs.
- Silicone caulk – For sealing around the sink edges.
Pro tip: Keep these tools in a small toolbox labeled “Plumbing Emergencies.” Trust me, when water is spraying under the sink at midnight, you don’t want to be searching through your garage for an adjustable wrench.
3. How to Repair Cracks and Chips in a Bathroom Sink
A cracked sink might look like a death sentence, but many small to medium cracks can be repaired without replacing the whole unit.
Step 1: Clean the area thoroughly.
Remove dirt, soap scum, and grime with a non-abrasive cleaner. The repair won’t stick to a dirty surface.
Step 2: Dry completely.
Moisture is the enemy of adhesives and epoxy. Use a hairdryer if needed.
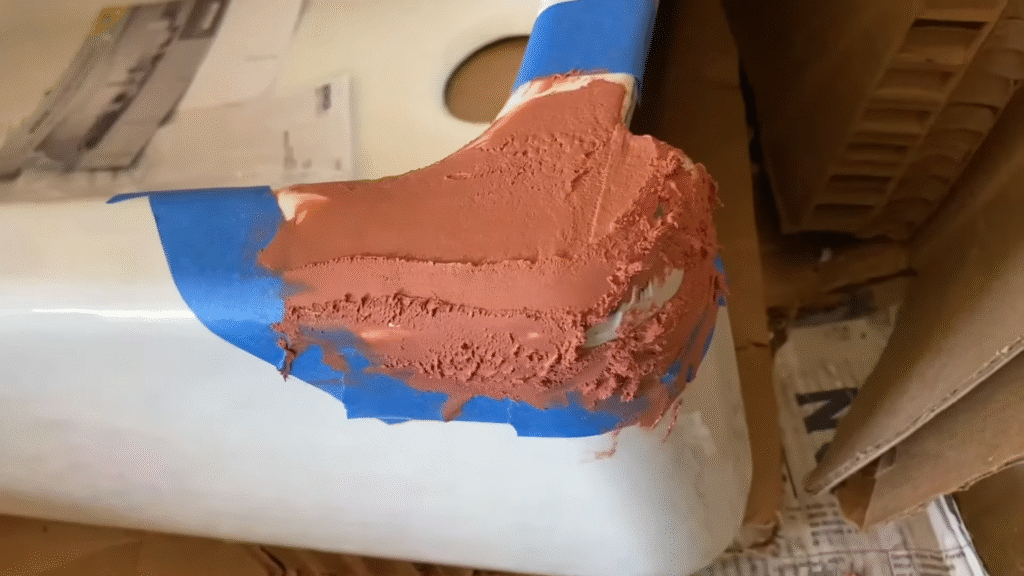
Step 3: Mix and apply the repair compound.
Most porcelain or ceramic repair kits come with epoxy putty or liquid you mix. Apply it directly to the crack or chip. Smooth it out with a putty knife.
Step 4: Let it cure.
Most epoxies take 24 hours to fully harden. Don’t use the sink during this time.
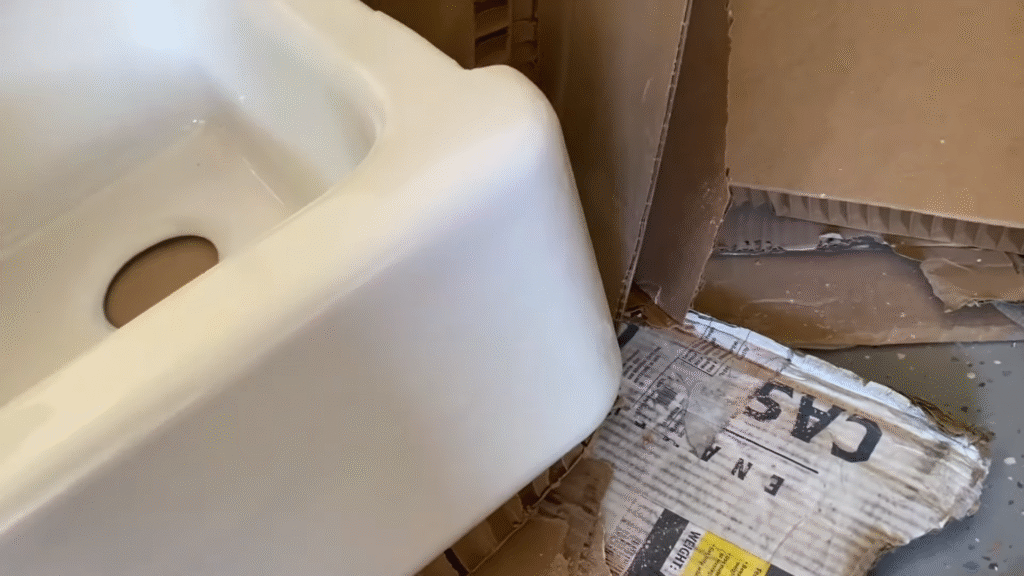
Step 5: Sand and paint (optional).
Some kits allow you to sand the area and apply touch-up paint to match the sink color.
Real-life note: When I first repaired a small chip, I was skeptical. But three years later, the patch still holds. Unless the crack is huge or the sink is split in half, repairs usually last longer than you think.
4. Fixing Leaks Around the Faucet
Leaky faucets are like tiny money pits—you’re literally watching your water bill drip away. In fact, the U.S. Environmental Protection Agency estimates that a single dripping faucet can waste 3,000 gallons of water per year.
Step 1: Turn off the water supply.
Look under the sink and twist the shutoff valves clockwise. If they’re stuck, use a wrench gently.
Step 2: Disassemble the faucet.
Remove the handle (usually with a screwdriver) and unscrew the retaining nut. Inside, you’ll find a cartridge, washer, or O-ring depending on the faucet type.
Step 3: Replace the worn part.
If the washer or O-ring looks cracked or flattened, replace it with a new one. They cost pennies but fix 90% of faucet leaks.
Step 4: Reassemble and test.
Turn the water supply back on and see if the drip has stopped.
I once ignored a leaky faucet for months. My water bill quietly crept up by $20 each cycle. Fixing it took all of 15 minutes and made me kick myself for not doing it sooner.
5. Repairing Leaks Underneath the Sink
Leaks under the sink are sneakier. You might not notice until the wood cabinet is swollen, moldy, or smelling musty.
Step 1: Identify the source.
Dry the area, then run the sink and watch closely. Is water dripping from the P-trap, supply lines, or the sink drain itself?
Step 2: Tighten connections.
Use your adjustable wrench to snug up any loose nuts. Don’t overtighten—hand-tight plus a quarter turn is usually enough.
Step 3: Replace washers or use plumber’s tape.
If tightening doesn’t stop it, unscrew the joint, wrap plumber’s tape around the threads, and reassemble.
Step 4: Replace damaged pipes.
Plastic pipes crack over time. If you spot a crack, replace that section. A new P-trap costs less than $15 at hardware stores.
Personal anecdote: I once thought I had a massive plumbing issue when water pooled under my sink. Turned out, the P-trap had just loosened over time. A five-minute tightening job saved me from calling a $250 plumber.
6. How to Clear a Clogged Sink Drain
A clogged sink is one of the most common (and annoying) problems. Instead of toxic chemical drain cleaners, try these safer and more effective methods:
Step 1: Plunge it.
Fill the sink with a few inches of water, place the plunger over the drain, and push up and down vigorously. This creates suction that can dislodge blockages.
Step 2: Use a drain snake.
Feed the snake into the drain and twist until you feel resistance. Pull out hair, gunk, and soap buildup. It’s gross but satisfying.
Step 3: Try the baking soda and vinegar trick.
Pour 1/2 cup baking soda followed by 1/2 cup vinegar into the drain. Wait 15 minutes, then flush with hot water.
Step 4: Remove and clean the P-trap.
If all else fails, place a bucket under the P-trap, unscrew it, and physically remove the clog.
Stat check: Consumer Reports found that 64% of clogged sinks can be fixed with a plunger or snake alone, no chemicals required.
7. When to Replace Instead of Repair
Sometimes, repairing isn’t enough. If your sink looks like it’s survived a bar fight, replacement might be smarter.
Replace your sink if:
- Cracks run deep and spread across the basin.
- The sink leaks even after multiple repairs.
- The plumbing underneath is rusted beyond saving.
- Mold or water damage has destroyed the cabinet below.
A new bathroom sink can cost anywhere from $100 to $500 depending on style. Add professional installation, and you’re looking at $300–$800 total. Still, sometimes peace of mind is worth the cost.
8. Preventing Future Sink Problems
The best repair is the one you never have to make. Here’s how to keep your sink in fighting shape:
- Don’t drop heavy items in the sink (looking at you, flat iron).
- Avoid harsh chemical cleaners that eat away at seals and finishes.
- Clean the drain regularly with a vinegar flush to prevent clogs.
- Check underneath monthly for leaks before they become disasters.
- Seal the caulk line every couple of years to keep moisture out.
Think of sink maintenance like flossing your teeth. It feels like a chore, but skip it too often and you’ll regret it later.
9. Cost Savings of DIY Sink Repair
Let’s talk numbers. Doing these repairs yourself isn’t just about pride—it’s about saving serious money.
- Fixing a leak yourself: $2–$10 in parts vs. $150–$300 for a plumber.
- Clearing a clog with a snake: $20 tool vs. $150 service call.
- Repairing a chip: $15 repair kit vs. $200 sink replacement.
Over time, DIY sink repair can save you hundreds, even thousands of dollars. And the confidence you gain? Priceless.
10. Step-by-Step Quick Fix Guide (At a Glance)
For those who love cheat sheets, here’s your bathroom sink repair in one glance:
- Diagnose the issue: crack, leak, clog, or loose pipe.
- Gather tools: wrench, epoxy, tape, snake, bucket.
- Fix cracks: clean, dry, apply epoxy, cure, sand.
- Fix faucet leaks: replace washers or O-rings.
- Fix under-sink leaks: tighten, tape, or replace pipes.
- Fix clogs: plunger, snake, baking soda, or clean P-trap.
- Replace if needed when cracks are too severe.
- Prevent future problems with regular checks and cleaning.
Conclusion
Repairing a broken bathroom sink doesn’t require a plumber’s license—just patience, the right tools, and a willingness to get your hands a little dirty. From sealing cracks with epoxy to replacing washers and unclogging drains, each fix adds another notch to your DIY belt.
The next time your bathroom sink misbehaves, don’t panic. Take a deep breath, roll up your sleeves, and remember—you’ve got this. And if you ever feel overwhelmed, start small. Even tightening a loose pipe can feel like a victory.
Fixing your own sink isn’t just about saving money. It’s about turning frustration into empowerment. And trust me, nothing feels better than brushing your teeth at a sink you repaired with your own two hands.
FAQs
1. Can I repair a cracked porcelain sink myself?
Yes, small to medium cracks can be repaired using a porcelain repair kit with epoxy. Larger cracks may require replacing the entire sink.
2. What’s the fastest way to unclog a bathroom sink?
Start with a plunger. If that doesn’t work, use a drain snake or clean the P-trap underneath. Avoid chemical drain cleaners—they can damage pipes.
3. How do I know if my sink needs replacing instead of repairing?
If cracks spread across the basin, leaks persist after repairs, or mold has damaged the cabinet below, it’s time for replacement.
4. How much does it cost to repair a sink yourself?
DIY repairs typically cost between $5 and $50 depending on materials. Hiring a plumber costs $150–$400 for the same job.
5. How can I prevent my sink from breaking again?
Avoid dropping heavy objects in the basin, clean drains regularly, check for leaks monthly, and reseal caulk lines every couple of years.